
An automatic metallographic grinder-polisher is one of the core laboratory devices for metallographic specimen preparation. Proper and standardized operation is the key to obtaining flat, low-damage sample surfaces for metal microstructure observation and material performance analysis. This blog shares practical step-by-step grinding and polishing workflows, plus critical safety notes for anyone working with metallographic polishing equipment in material-testing labs.
1. Grinding Operation Steps
The purpose of grinding is to remove cutting-induced damage layers on specimens and create flat base surfaces for subsequent polishing work.
- Pre-operation Preparation
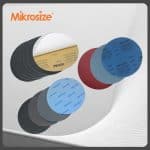
Select abrasive sandpapers of appropriate grit sizes, always starting from coarse grit. Rinse the sandpaper thoroughly with clean water, then stick the wet sandpaper flat and tight onto the grinding platen.
- Machine Configuration
Turn on the water supply switch and adjust water flow rate. Keep continuous water irrigation during grinding for cooling and surface cleaning. Switch on machine power, and let the grinding platen rotate stably at the preset direction (normally counter-clockwise).
- Specimen Grinding Process
Hold the specimen firmly and bring it gently toward the rotating sandpaper. Once stable contact without bouncing is achieved, apply uniform downward pressure. Adjust pressure according to specimen material hardness. In the initial coarse-grinding phase, you may apply relatively higher pressure (around 2 kgf) to remove material efficiently. Move the sample slowly radially outward from the center toward the platen edge to ensure uniform grinding and avoid deep scratches.
- Post-Grinding Treatment
After finishing one grit level, rinse the specimen completely. Replace sandpaper with finer grit and repeat the above grinding steps until you get a surface free of obvious deep scratches.


2. Polishing Operation Steps
Polishing aims to eliminate fine grinding scratches and achieve mirror-finish surface quality for metallographic examination.
- Pre-polishing Preparation
Choose suitable polishing fabrics such as velvet cloth or nylon polishing cloth. If you use pressure-sensitive adhesive polishing pads, attach them directly to the polishing platen. For non-backing polishing textiles, lay them flat and fasten tightly with an outer retaining ring.
- Apply Polishing Compounds
Dispense adequate polishing agent (such as diamond spray or alumina suspension) onto the center of the spinning platen, so the abrasive liquid spreads evenly across the polishing fabric.
- Specimen Polishing Procedure
Start the rotation of the polishing platen. Hold your specimen stable and press it moderately against the polishing cloth. Start from the central area of the platen and slowly shift the sample toward the edge, making full use of the whole disk for homogeneous polishing.
Maintain moderate contact pressure. Too much pressure will introduce new scratches; insufficient pressure leads to low polishing efficiency.
- Process Monitoring & Adjustment
If the polishing fabric becomes sticky or polishing performance degrades, add extra polishing liquid or clean water to maintain ideal working conditions. Replace worn, contaminated or damaged polishing cloths in time, otherwise sample surfaces may be scratched and final metallography results ruined.

3. Safety Operation Notes for Metallographic Grinding-Polishing
Standard operation protects operators, preserves machine service life, and guarantees reliable specimen quality.
- Electrical & Equipment Safety
Before startup, inspect power cords and switches. Ensure reliable equipment grounding to prevent electric shock hazards. Confirm all protective covers are well installed. Never disassemble, install or clean components while rotating platens are still running.
- Personal Safety Reminders
Stay focused during operation. Hold specimens securely to prevent sample ejection. Keep fingers away from spinning disks to avoid injury. Fine abrasive particles will generate during grinding-polishing work. Work in well-ventilated lab space or wear protective respirators as recommended.
- Equipment Maintenance & Specimen Protection
After use, cut off power and water supply. Thoroughly clean machine chambers and work benches, preventing residual abrasives from corrosion or blockage. Always follow the “from coarse to fine” processing principle. Fully clean both specimens and your hands between every procedure step. Prevent coarse particles from previous steps contaminating polishing media and damaging finished surfaces.

Conclusion
Mastering standardized workflows for automatic metallographic grinder-polisher is essential for repeatable, high-quality metallographic sample preparation. Wrong pressure settings, improper consumable selection or ignored safety rules will produce defective samples and bring potential lab risks. Operators should strictly follow step-by-step grinding-polishing protocols and keep good daily maintenance habits. If you look for reliable metallographic grinding-polishing lab equipment, Mikrosize provides well-engineered metallography instruments and supporting consumables to simplify your specimen-preparation workflows and improve your lab testing efficiency.