-4.png "How to Use the uVicky-1 Micro Vickers Hardness Tester? 1")
Before Using the uVicky-1 Micro-Vickers Hardness Tester
Read and fully understand all relevant safety precautions before operation. Follow the standard procedures below:
Preparation Work
- Select a stable, vibration-free workbench to place the tester. Mount the test specimen on the stage and ensure its surface is flat and firmly seated against the stage. An uneven specimen surface will compromise test accuracy. Prepare auxiliary tools including tweezers and alcohol swabs for specimen cleaning and instrument adjustment.
- Power-on and CalibrationConnect the tester’s power supply and press the power-on button. Wait for the instrument to finish its self-check, then perform calibration. This step is critical to guarantee measurement accuracy. Calibration normally requires a standard hardness test block; follow the calibration procedures specified in the instrument operation manual. Monitor instrument readings throughout calibration to verify valid calibration results.
- Select Test ParametersBased on the specimen material and its hardness range, set suitable test parameters including test load and dwell time. In general, harder materials require a higher test load, while softer materials require a lower one. Dwell time also impacts test results and shall be adjusted per actual test conditions. Parameter selection shall comply with applicable material hardness standards and the instrument operation manual.
-2-300x153.jpg "How to Use the uVicky-1 Micro Vickers Hardness Tester? 2")
.jpg "How to Use the uVicky-1 Micro Vickers Hardness Tester? 3")
-1-224x300.jpg "How to Use the uVicky-1 Micro Vickers Hardness Tester? 4")
-1-224x300.jpg "How to Use the uVicky-1 Micro Vickers Hardness Tester? 5")
Focus and Positioning
View the specimen under the microscope and adjust the focus knob to bring the specimen surface into sharp focus. Use the stage translation mechanism to move the test point to a proper location on the specimen. Avoid selecting areas with surface defects or contaminants to secure reliable test data.
Perform the Test
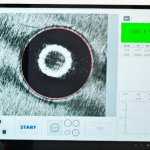
Once all parameters are verified as correct, press the test button. The tester will automatically apply the test load and unload after the preset dwell time elapses. Maintain stable positioning of the tester and specimen during testing; eliminate external vibration or disturbance. Upon test completion, inspect the indentation under the microscope and use the instrument’s built-in measuring function to read the indentation diagonal lengths.
Calculate Hardness Value
Compute the specimen’s Vickers hardness using the official Vickers hardness formula and the measured indentation diagonal lengths. Ensure correct unit conversion and proper formula application during computation. For uncertainties regarding calculated results, consult the instrument manual or qualified technical personnel.
Record Data & Clean-Up
Document all test data, including specimen ID, test point location and hardness readings. Clean the specimen and stage, then power off the tester. Wipe the specimen and tester surfaces with fresh alcohol swabs to prevent residual contaminants from interfering with subsequent tests.
-150x150.jpg)