Introduction
Rockwell hardness testers stand among the most sophisticated precision instruments for metal hardness evaluation. Unlike other hardness testing techniques, Rockwell systems calculate hardness values by measuring residual indentation depth after force application. Few quality engineers realize just how sensitive these machines are: a tiny mechanical shift of only 2 μm can create a full-point offset in hardness results. Vibration during shipping and storage, or insufficient stress relief from cast housing natural aging, frequently trigger hidden measurement drift. Even well-maintained digital Rockwell hardness testers deliver bad data when pre-inspection, calibration routines, or reference-block handling steps get overlooked. This blog breaks down actionable pre-test checks, mandatory calibration tests, reference-block rules, and widespread operational mistakes to help your lab achieve repeatable results compliant with ASTM E18 and ISO 6508 standards.
Pre-Test Instrument Inspection Checklist for Benchtop Rockwell Hardness Tester
Skipping these quick pre-start checks is the #1 cause for erratic readings on production QC floors. Every technician should run through this checklist before starting daily hardness testing.
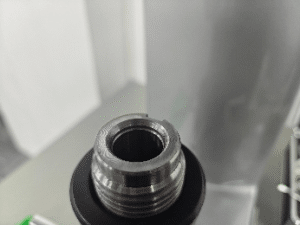
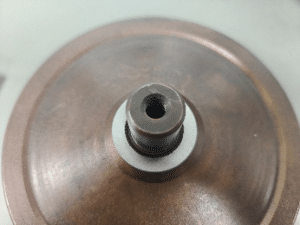
- Keep all contact surfaces oil-free, dust-free and burr-free The worktable mounting seat, lead-screw threads, and indenter mating end face require thorough cleaning. Even thin residual anti-rust oil will compromise surface-to-surface contact. Remove burrs with a fine oil-stone. Oil residue or burr gaps directly produce unpredictable measurement deviation.
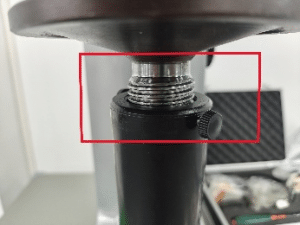
- Verify lead-screw and worktable fit condition No bearings should sit between the lead-screw and lead-screw base assembly. The clearance between worktable and lead-screw must be minimal. Excessive play or wobble is guaranteed to generate unreliable hardness test outcomes.
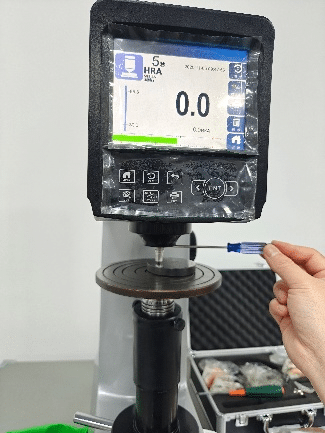
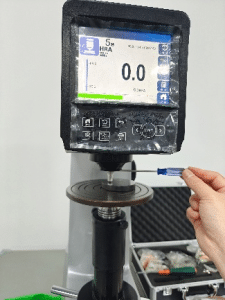
- Correct diamond indenter installation Always wipe clean the indenter contact face before mounting your diamond indenter. Apply preliminary minor test force, then firmly fasten the indenter with appropriate tools. If you fasten the screwdriver to different rotational positions each time you swap or retighten the indenter, measurable reading errors will appear.
Mandatory Calibration & Performance Verification Tests
Good Rockwell hardness tester calibration goes far beyond running one quick test point on a reference block. These verification steps validate mechanical health of the whole instrument system.
- Concentricity performance test Apply preliminary minor load to make one indent mark. Release force, rotate the worktable by 90°, reload, and repeat this full cycle four times. Inspect indent locations, then measure center-to-center spacing between opposite indentations. Maximum allowable offset distance is 0.3 mm. Poor concentricity points to misaligned internal mechanics.
- Machine frame deformation inspection Fit a 10 mm or 12.7 mm steel-ball indenter. Run tests on a high-hardness reference block (~60 hardness scale value) under 100 kgf test force. Collect 10 total points and evaluate only the final three readings. Acceptable measured values must land within 100 ± 1. This check catches hidden frame deflection that ruins both high-hardness and low-hardness sample measurements.
- Strict load-cycle timing compliance The complete standard test sequence (apply preliminary minor load → dwell → apply major test load → dwell → unload major load) must finish within 21 seconds total. Major-load dwell timing starts counting the moment force output reaches the set target value, NOT when the screen display updates. Incorrect dwell periods, especially while testing soft ductile metals, deepen indent penetration and create falsely-low hardness numbers. This parameter must be documented within your lab SOP for Rockwell hardness testing.
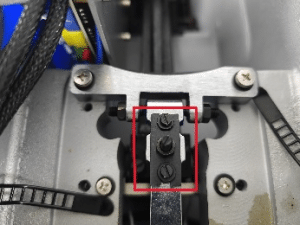
- Internal lever horizontal alignment check After applying preliminary minor test force, the internal small lever assembly must sit perfectly horizontal, without upward tilting. A tilted lever creates uneven sensor loading, causing large discrepancies between high-hardness specimen readings and low-hardness specimen readings.
Best Practices for Using Certified Reference Hardness Blocks
Reference hardness blocks are your measurement traceability benchmark. Misusing reference blocks is one of the most frequent audit findings under IATF 16949 metal-quality requirements.
- Perform indentation only on the printed marked side of reference blocks. Never test the reverse unmarked surface.
- Follow indent-layout distribution rules:
- Circular reference blocks: Space indentations along a spiral path; never cluster multiple indents inside one small local zone.
- Square reference blocks: Place test marks at four corners plus one central test point.
- After finishing calibration work, coat reference blocks with anti-rust protective oil and store inside proper packaging. Oxidation or surface plastic deformation will invalidate the block’s certified value for future Rockwell hardness verification.

Common Misconceptions, Hidden Pitfalls & Practical Field Tips
Many inaccurate hardness-report issues stem from misunderstood machine functions and factory-side blind spots, not defective hardware.
- Factory preset parameter trap Some instrument manufacturers tune machine output values to match their in-house supplied reference blocks instead of official certified standard values. For reliable QC work, always cross-check performance using third-party certified reference hardness blocks with valid calibration certificates.
- Software correction has hard limits If your force-measuring system drifts out-of-spec, segmented software offset correction cannot fix the root-source error. Valid force metrology performance is the non-negotiable prerequisite before applying any software compensation. Relying purely on software masking mechanical defects will deliver misleading inspection data.
- Weight hook installation adjustment Misaligned weight hooks can make weights collide against each other. When performance problems show up after equipment transportation, technicians can fine-tune hook adjusting nuts to restore proper weight positioning.
- Worktable protective sleeve installation warning Make sure the protective sleeve never presses or bears physical load against the worktable after assembly. Mechanical contact interference will consistently produce wrong hardness measurements.
- Important note for international & overseas customersASTM E18 and ISO 6508 enforce strict verification requirements for hardness-testing instruments. Run the complete in-house self-check workflow before factory shipment; do not trust screen readouts alone for final compliance validation.
Conclusion
Achieving stable, defensible Rockwell hardness test results relies on systematic pre-test inspection, thorough mechanical performance verification, proper handling of certified reference blocks, and standardized operating procedures — not just high-quality hardware. Even premium-grade automatic digital Rockwell hardness testers produce misleading data when technicians overlook small mechanical details like surface cleanliness, lever alignment, dwell-time rules and reference-block layout. Every quality-control lab should embed these inspection and verification steps into daily shift-start routines to reduce measurement variation and pass third-party audits smoothly.
When you are sourcing reliable hardness-testing instruments and building standardized QC workflows for metal component inspection, partner with a trusted metrology expert such as Mikrosize. Mikrosize’s full portfolio of bench-top digital Rockwell hardness testers, certified reference hardness blocks, and application-oriented training materials fully comply with ASTM E18 and ISO 6508-1 standards. Their technical support team helps manufacturing and QC teams eliminate avoidable measurement errors, improve Gauge R&R performance, and establish traceable hardness-testing workflows for automotive, aerospace and general-industry metal-quality-control applications.