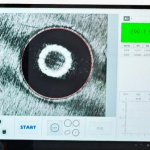

If you are searching for how to perform reliable Vickers microhardness measurement, best-practice guidelines for micro Vickers hardness test, or common mistakes in Vickers hardness sample preparation, this practical blog will walk you through critical operational specifications for consistent, traceable test data.
Vickers microhardness testing applies tiny experimental forces and creates miniature indentations, bringing minimal damage to test specimens. Widely adopted for production quality inspection and advanced materials science and engineering research, it has become one of the most-used hardness evaluation techniques in metallography and metal material analysis. To obtain repeatable and trustworthy HV values when using the Vickers hardness scale, you must strictly comply with the following key operational requirements based on standard GB/T 4340 for metallic-material Vickers hardness tests.
- Both the Vickers hardness tester instrument and diamond indenter shall meet the requirements laid out in relevant official standards such as GB/T 4340 series. Regular calibration and verification are essential to avoid systematic measurement deviation.
- Control laboratory ambient temperature within 10 ℃ to 35 ℃ for general testing scenarios. For high-precision measurement tasks, maintain a stricter temperature condition of (23±5) ℃ to minimize thermal-expansion-caused reading drift.
- The surface of the test specimen must be flat, smooth, and well-polished. Rough, scratched or deformed surface layers will distort indent geometry and produce false hardness results.
- The thickness of the specimen or target tested layer should be at least 1.5 times the indentation diagonal length. Insufficient thickness leads to substrate influence and invalid hardness readings.
- When conducting low-force Vickers test and Vickers microhardness test on mini-size or irregular-shaped samples, mount specimens in resin embedding media or secure them with dedicated specimen fixtures to prevent shifting during indentation cycles.
- Reasonably select appropriate test force (indentation load) according to specimen hardness grade, physical thickness and overall dimension. Improper load selection is one of the top sources of bad microhardness test outcomes.
- The time span from load initiation to full test-force completion shall range from 2 s to 10 s. Specifically, for micro-Vickers tests this loading duration should not exceed 10 s; for conventional Vickers tests keep loading time between 2 s-8 s. Maintain dwell holding time at 10-15 s. For extremely soft materials, dwell time can be extended, yet time error must stay within ±2 s tolerance window.
- Indenter descending speed should be strictly regulated: 15-70 μm/s for low-force and micro-Vickers hardness tests, while conventional Vickers testing requires descent speed no greater than 0.2 μm/s. Too-fast indenter movement generates impact damage to diamond tips and specimens.
- For steel, copper and copper-alloy samples: keep the distance from indentation center to specimen edge no less than 2.5 × indentation diagonal length. For lightweight metals, lead, tin and their alloys, this safety clearance shall reach 3 × indentation diagonal length or above, to eliminate edge-effect interference.
- Minimum spacing rule for adjacent indent centers: for steel, copper and copper alloys, distance ≥ 3 times indent diagonal length. For light metals, lead-tin-based alloys, maintain at least 6 times indent diagonal length gap between two nearby impressions, preventing work-hardening cross-influence between test points.
- On flat specimen surfaces, the length difference between the two diagonals of one indentation shall not surpass 5 % of average diagonal value. If this threshold gets exceeded, you must note this abnormality explicitly in your hardness test report.
- When you carry out Vickers hardness testing on curved-surface specimens, apply official standard-specified correction factors to raw measured values; un-corrected raw numbers cannot be directly adopted as final hardness results.


Conclusion
Mastering standard operating procedures for Vickers microhardness testers directly determines whether your lab can deliver credible, comparable hardness data for metallurgical analysis, coating-layer inspection, and incoming-material quality validation. Every detail including temperature control, sample mounting, load selection, dwell-time configuration and indent-spacing compliance deserves full attention during daily testing workflows. Partnering with trusted metrology-solution providers such as Mikrosize can help laboratories optimize instrument setup, streamline Vickers microhardness sample preparation, reduce human-induced error, and boost overall testing efficiency and result reproducibility for long-term material-testing projects.